

How to Clean Your Revolt Electric Bike Properly: What Products to Use, What to Avoid, and How Often
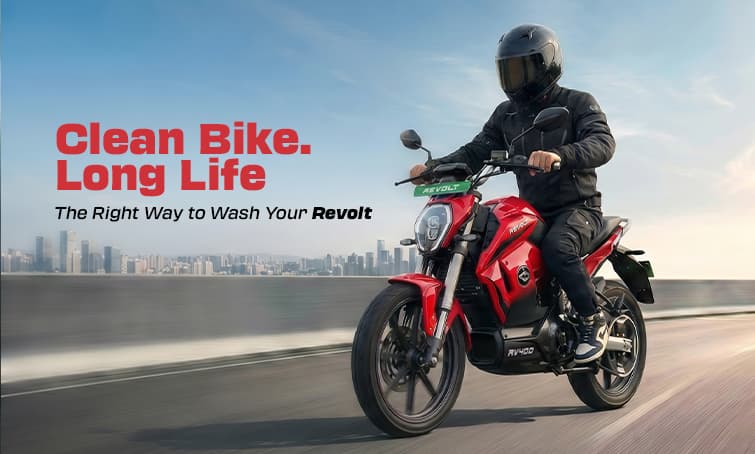
Most Revolt owners wash their bike the same way they washed their old petrol bike. Bucket of water, cloth, maybe a jet from the tap and they are done.
That works fine most of the time. But there are a few things that are genuinely different about cleaning an electric bike and getting them wrong can damage components that are expensive to fix.
This guide covers everything: what to use, what to avoid, how to do it step by step, and how often. Five minutes of reading will make you a better bike owner for the next five years.
First: Is It Safe to Wash Your Revolt with Water?
Yes. Completely.
All Revolt models carry an IP67 waterproof rating on the battery pack. This means the battery is sealed against dust and protected against temporary water immersion. You can ride through monsoon puddles, get caught in heavy rain, and wash the bike with a normal garden hose without worrying about electrical damage.
What the IP67 rating does not mean: invincible against everything. High-pressure jet washers, direct spraying into connector ports, and submerging the bike are all things you want to avoid not because the bike will fail immediately, but because repeated exposure to high-pressure water over time can work its way into bearings, seals, and electrical connectors.
The rule is simple: gentle water is fine. High-pressure water is not.
What You Need Before You Start
You do not need special products. Most of what you need is probably already at home.
- A bucket of water
- Mild car wash soap or gentle dish soap (pH neutral is best)
- Two soft microfibre cloths or wash mitts — one for washing, one for drying
- A soft-bristle brush or old toothbrush for tight spots
- A garden hose or mug for rinsing (low pressure only)
- Dry cloth or chamois leather for the final wipe-down
Optional but useful:
- Spray detailer or quick-detailing spray for a finishing shine
- Belt drive cleaner (a dry cloth works fine for regular maintenance)
- Silicone spray for plastic parts
That is it. No specialist electric bike cleaning kits required unless you want them.
What to Absolutely Avoid
These are the things that can actually cause damage. Read this section before anything else.
High-Pressure Jet Washers: the most common mistake. The pressure is strong enough to force water past seals into bearings, the motor, and electrical connections. Even if the bike's IP rating handles rain, a jet washer operates at far higher pressure. Keep it away.
Direct Spraying at Electrical Connectors: the charging port, the battery connector, and the display wiring harness are the most sensitive points. Avoid pointing water or spray directly at them even with a normal hose.
Harsh Chemical Cleaners: bleach, drain cleaner, industrial degreaser, acid-based cleaners. These strip paint, corrode metal, crack rubber seals and damage plastic panels. Use only mild, pH-neutral soap.
Petrol or solvent-based cleaners on painted surfaces: they dissolve the clear coat over time.
Lubricants on Brake Discs or Brake Pads if lube or spray polish gets on the brake rotor or pads, it reduces braking performance significantly. Keep all lubricants away from the brake system entirely.
Washing Immediately After a Long Ride: the motor and other components are warm after use. Give the bike 10 to 15 minutes to cool down before washing. Sudden cold water on warm metal can cause minor thermal stress over time.
Step-by-Step Cleaning Guide
Step 1: Remove the Battery
Before you start washing, remove the battery pack and bring it indoors.
The battery is IP67 rated and can handle water. But there is no reason to expose it to soapy water, and cleaning is much easier without it in place. It also lets you clean the battery compartment more thoroughly.
Set the battery aside on a dry surface. Do not wash it separately just wipe it down with a damp cloth if it has any dirt on it.
Step 2: Dry-Brush the Loose Dirt First
Before any water touches the bike, use a soft brush or dry cloth to knock off loose dust, dried mud, and debris — especially from the tyres, chain cover, and under the fender.
This prevents loose grit from being dragged across the painted surface when you start washing, which causes fine scratches over time.
Step 3: Rinse with Low-Pressure Water
Use a garden hose on its gentlest setting, or pour water from a mug or bucket. The goal is to wet the surface and soften any remaining dirt.
Avoid pointing the hose directly at:
- The charging port
- The display/instrument cluster
- The electrical connectors near the battery slot
- The wheel hub bearings
A gentle all-over rinse is fine. Sustained direct spray at the above points is not.
Step 4: Wash with Soapy Water
Mix a small amount of mild car wash soap or gentle dish soap in a bucket of water. Dip your microfibre mitt or soft cloth into the soapy water and wash the bike section by section:
- Bodywork and tank area gentle circular motions, no scrubbing
- Frame and swingarm work into the corners and joins with a soft brush
- Wheels and tyres scrub the tyre sidewalls and rim faces; be thorough here as road grime builds up fastest
- Under the seat and around the battery slot use the soft brush or old toothbrush for tight spots
- Instrument cluster/display wipe gently with a barely damp cloth only; no direct water spray, no cleaning spray
Step 5: Rinse Thoroughly
Rinse off all the soap with clean water. Soap residue left on the bike attracts more dust and can dull the paint finish over time.
Again low pressure, no direct spray at connectors or the display.
Step 6: Dry Completely
This is the step most people rush and it matters.
Use a clean, dry microfibre cloth or chamois leather to wipe the entire bike dry. Pay attention to:
- Inside the battery slot dry this completely before reinserting the battery
- Around the charging port dry before the next charge
- The display and instrument cluster wipe dry to prevent water spots
- Joints and crevices: water sitting in joins can cause long-term surface rust on metal parts
Let the bike air-dry for an additional 10 minutes in a shaded spot before reinserting the battery.
Step 7: Reinsert the Battery and Do a Quick Check
Put the battery back in, ensure it clicks firmly into place, and power the bike on to confirm everything is functioning normally. Check the display, brake lights, and indicators.
If anything seems off error codes on the display, a warning light that was not there before do not ignore it. Check the MyRevolt app's diagnostics panel and contact Revolt support if the issue persists.
How Often Should You Clean Your Revolt?
Here is a simple cleaning schedule based on how you ride:
| Riding Condition | How often to Clean |
| Daily city commute (dry weather) |
Once Every 2 Weeks |
| Daily city commute (post-monsoon or dusty) |
Once a Week |
| After any ride through mud or heavy rain |
Same day or Next Day |
| Long ride (50 km+) |
Within 2 days |
| Bike sitting unused for 2+ weeks |
Before next ride |
A quick wipe-down after every ride just a dry cloth over the bodywork takes 2 minutes and keeps dust from building up between proper washes. In Indian cities where construction dust, exhaust soot, and road grime are constant, this small habit makes a noticeable difference to how the bike looks over time.
Caring for Specific Parts
Belt Drive: The RV400 and BlazeX use a belt drive instead of a chain. Unlike a chain, the belt requires no lubrication. Wipe it down with a dry cloth to remove dust and grit. Do not apply chain lube or oil to the belt it is not designed for it and will attract more dirt.
Tyres: After washing, check tyre pressure. Water can sometimes cause a temporary drop in pressure readout on some gauges. Keep tyres inflated to the recommended pressure in your owner manual.
Brake Discs: If you used any polish or detailing spray on the bodywork, double-check that none has landed on the brake rotors. Wipe them clean with a dry cloth if needed. Glazed brakes — caused by oil contamination feel spongy and are slower to bite.
Seat: A damp cloth is all you need. Avoid soaking the seat as water can seep into the foam over time. A light wipe keeps it clean and prevents cracking in summer heat.
Display/instrument Cluster: Never use glass cleaner or screen spray directly on the display. A lightly damp microfibre cloth is enough. Dry immediately after.
Quick Reference: Do's and Don'ts
| Do | Dont's |
| Remove battery battery before washing | Use a pressure jet washer |
| Use mild, pH-neutral soap | Spray directly at connectors or display |
| Rinse with low-pressure water | Use bleach or acid-based cleaners |
| Dry thoroughly before reinserting battery | Lubricate the belt drive |
| Clean belt drive with dry cloth only | Apply polish or lube near brake discs |
| Let the bike cool before washing | Wash immediately after a long ride |
The Bottom Line
Cleaning your Revolt is simple. The biggest mistakes pressure washers, harsh chemicals, and soaking electrical connectors are easy to avoid once you know about them.
Remove the battery. Use mild soap and a soft cloth. Rinse gently. Dry completely. That is 95% of the job.
A clean bike is not just about looks. Dirt and grit that sits on the frame, in the joints, and around moving parts accelerates wear over time. A 20-minute wash every fortnight adds years to your bike's life and keeps it looking as good as the day you picked it up.
Have a question about maintaining your Revolt? Book a service appointment at your nearest Revolt Hub our technicians are happy to walk you through any maintenance questions in person.